Using custom mapped fields is one feature in Dubsado that many people might not realize is there, but is a feature that can be very powerful in streamlining your workflow.
As a photographer, one of the ways I use this feature in my own business is to generate a wedding day timeline for my clients. After meeting with my clients to discuss their timeline for their wedding day, all I have to do when I get home is type out their timeline into a premade form, and it generates a beautiful timeline for me to send to my clients!
Using custom mapped fields, you can also populate any other answers from clients into other forms. In this example, I, as the business owner, am filling out the information, but these can also be used on forms your client fills out.
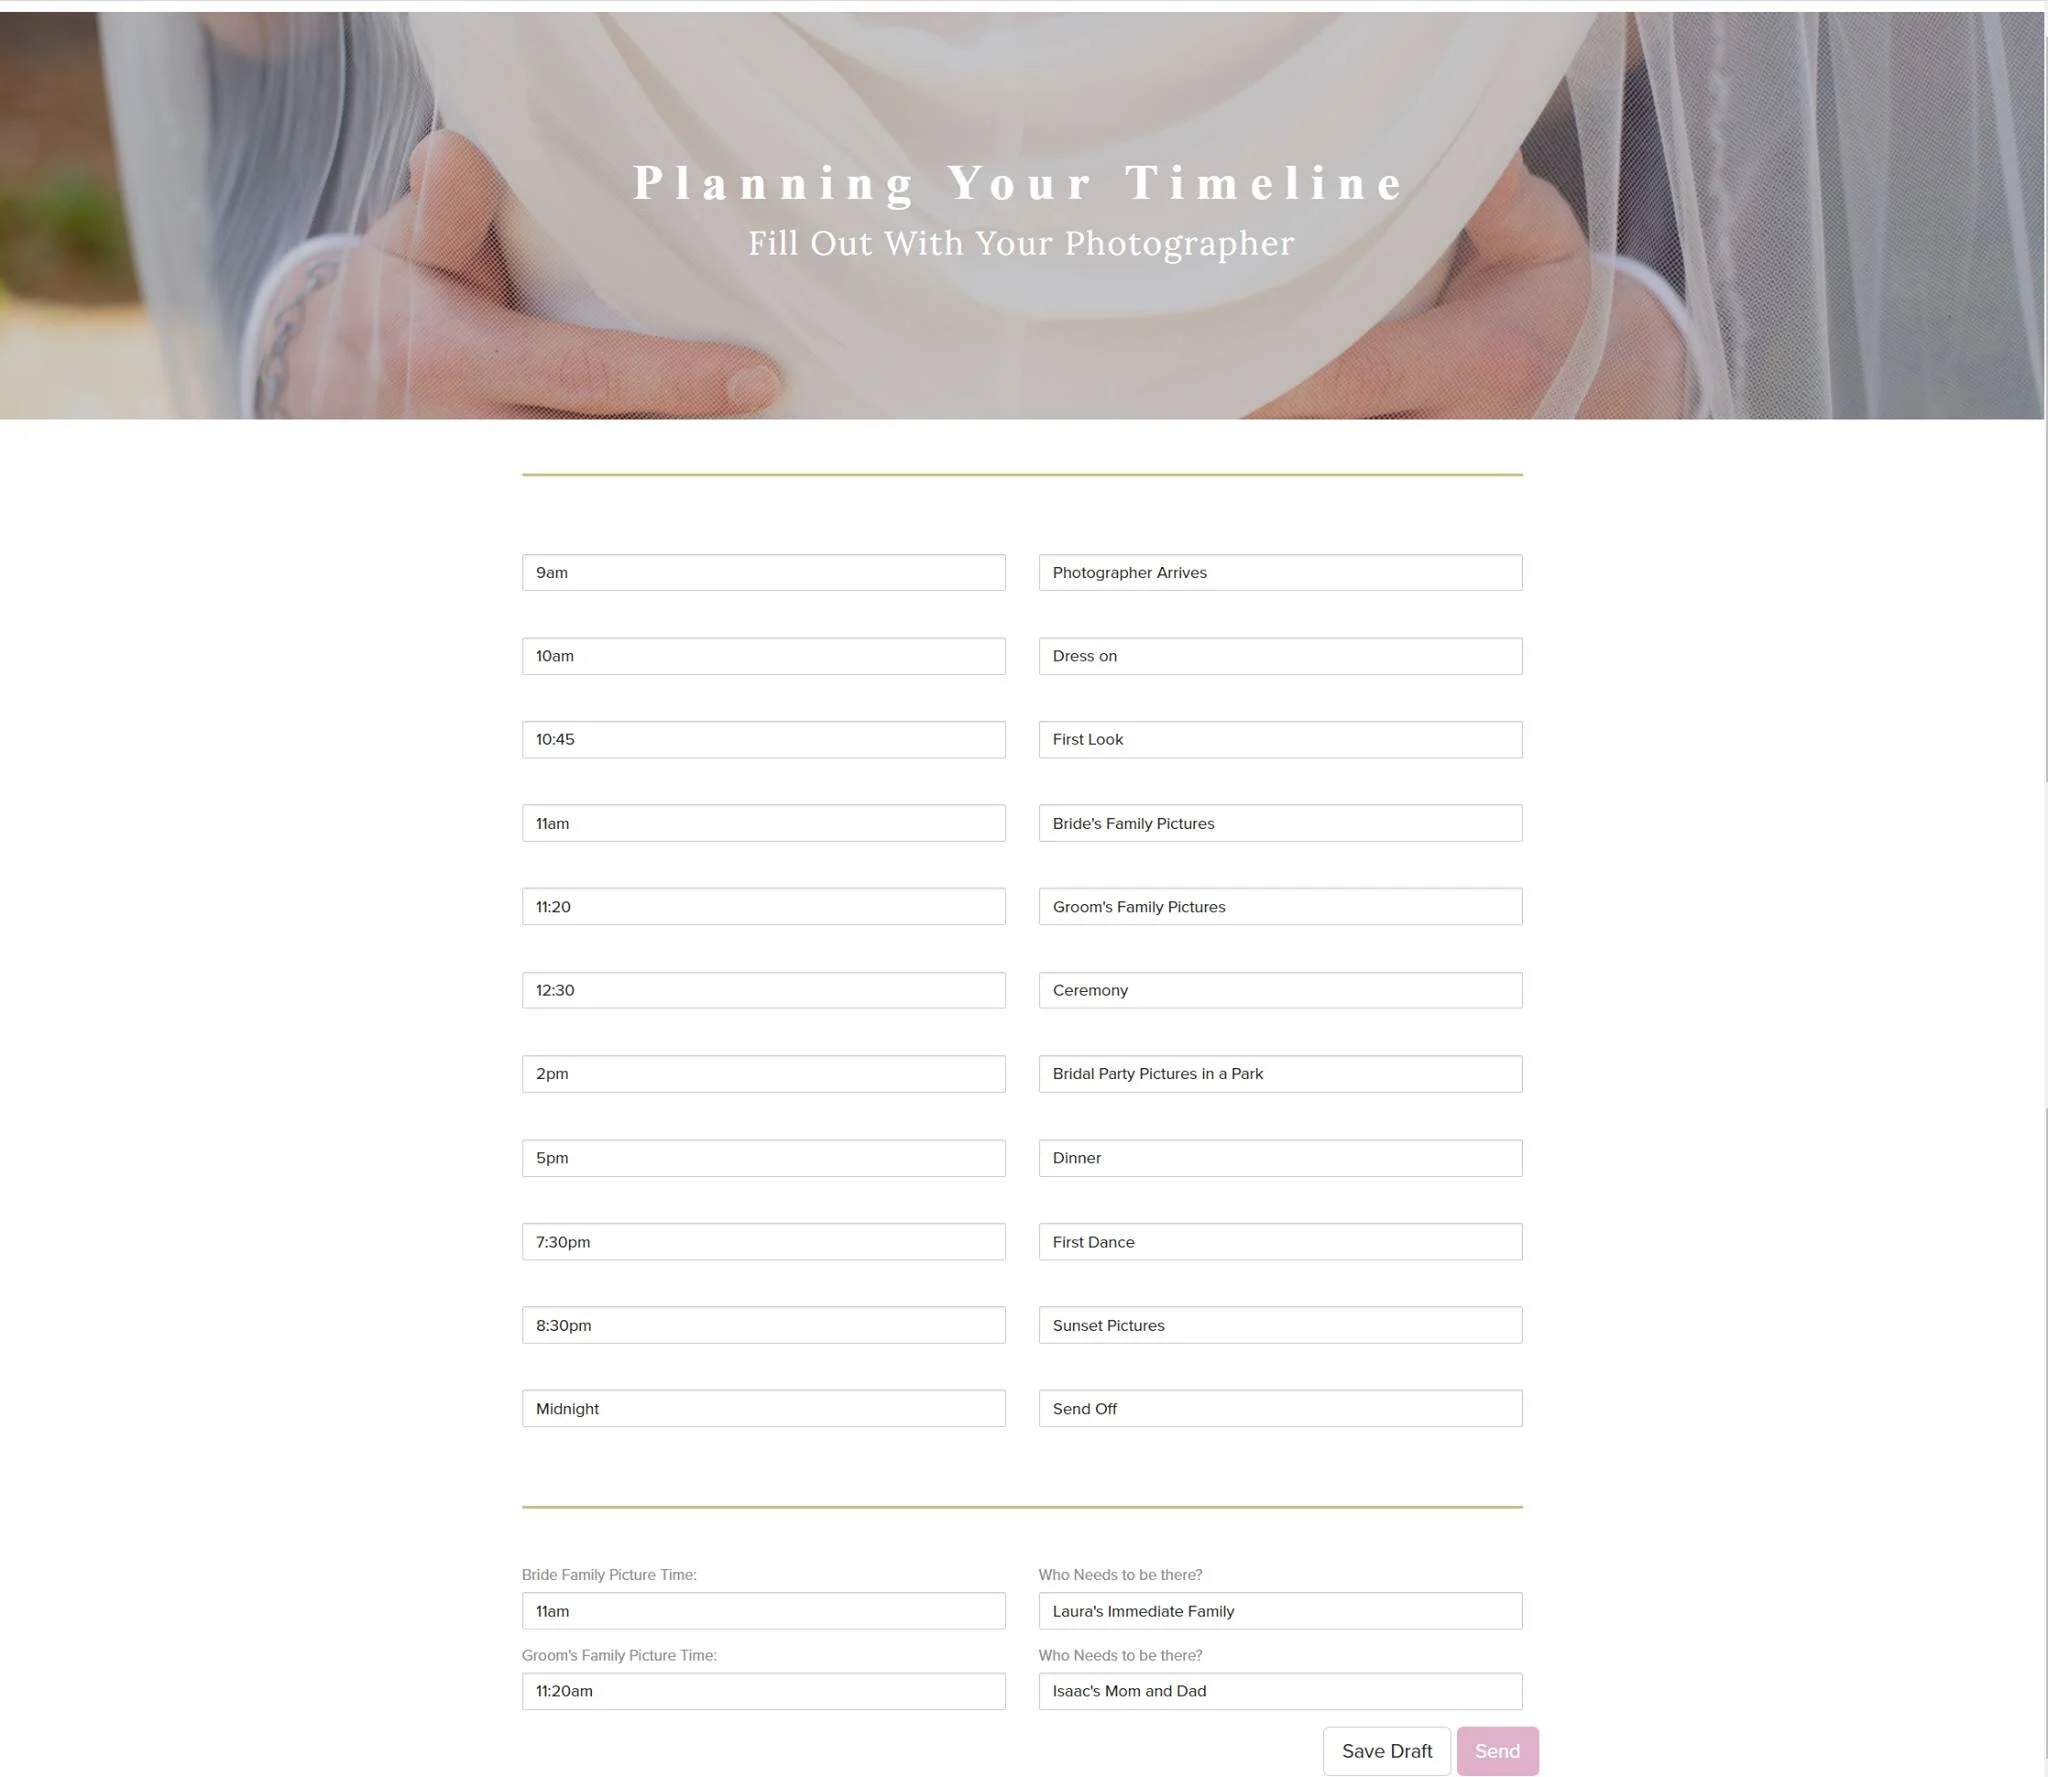
Here is an example of what we will be creating today. The first form is where the information about the timeline is entered, and the second form is where it is automatically generated.

So how do we do this? Let’s break it down step by step for you.
Creating Your Custom Mapped Fields
First, we will need to open up the custom mapped field area. This is located in your settings, (The gear icon at the top of the page) under “Custom mapped Fields”
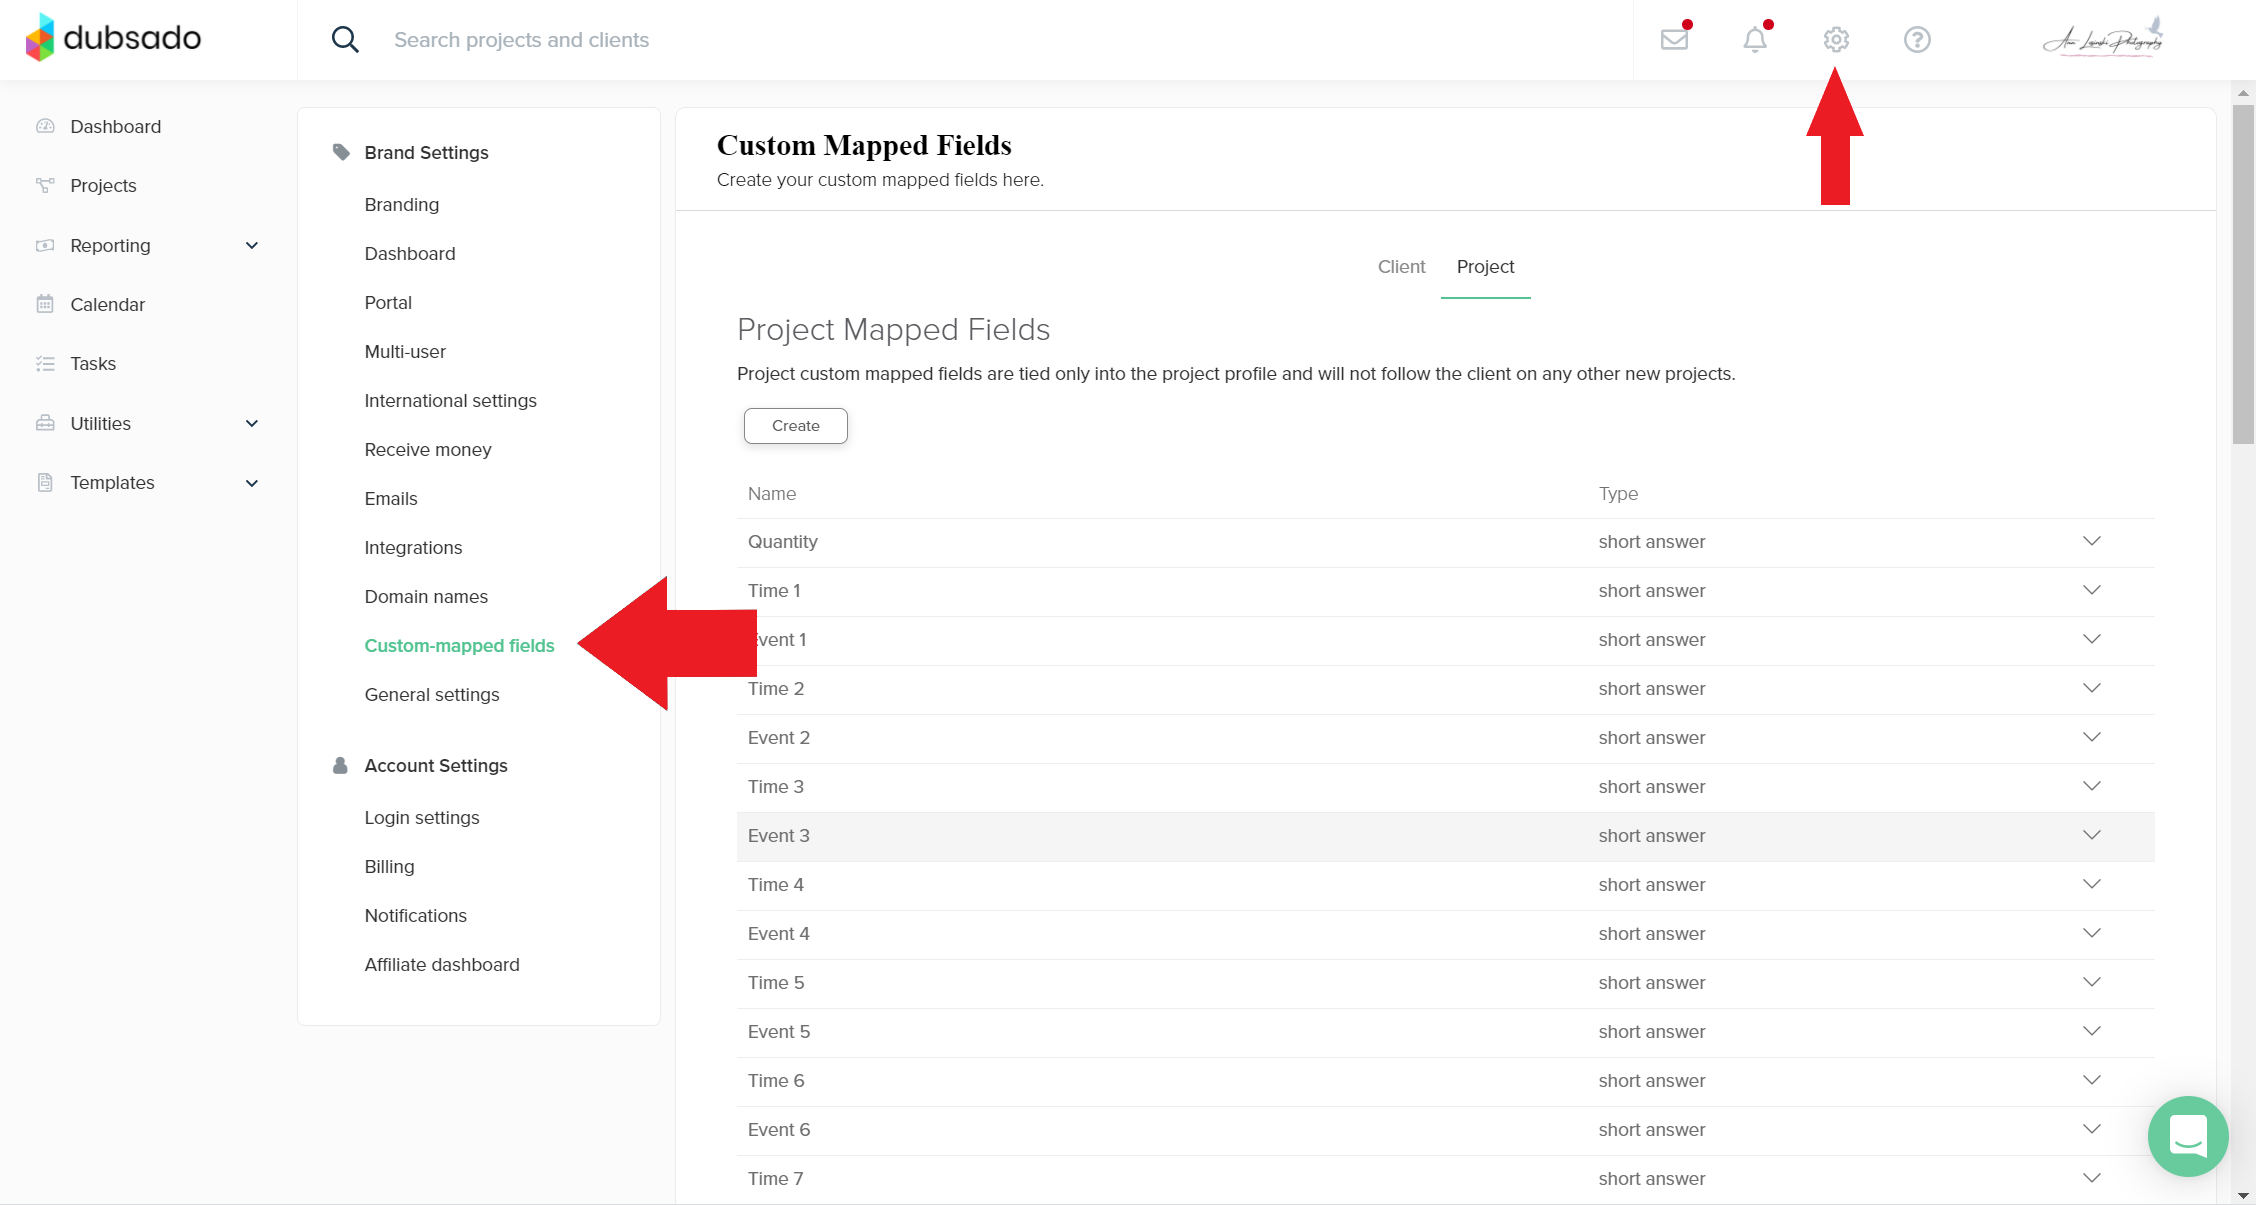
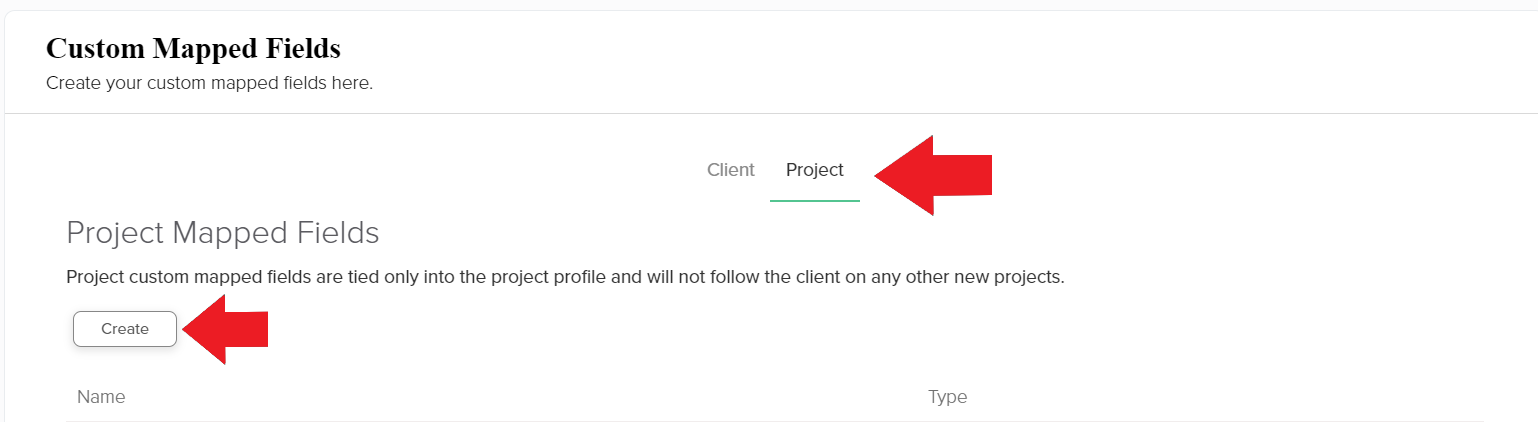
There are two types of custom mapped fields. “Client” mapped fields will stick with your client across multiple projects and can be useful if you need information that will be used across more than one project. “Project” mapped fields will be mapped to the current project only. For our purposes, we will be working with the “Project” field. Click on the Project tab and then click “Create”.
When you click create, a new box will populate. There are two options for fields, “Date” and “Short Answer”. You can use the date option if you want to create a space to track client birthdays, etc. But for creating our timeline, we will be using the “Short Answer” fields. To create you first smart field for your timeline, you will want to type in Event 1. Then click save.
Spoiler: if you name your smart fields exactly the same way I do, I have an easy code for you to copy and paste into your form later on!
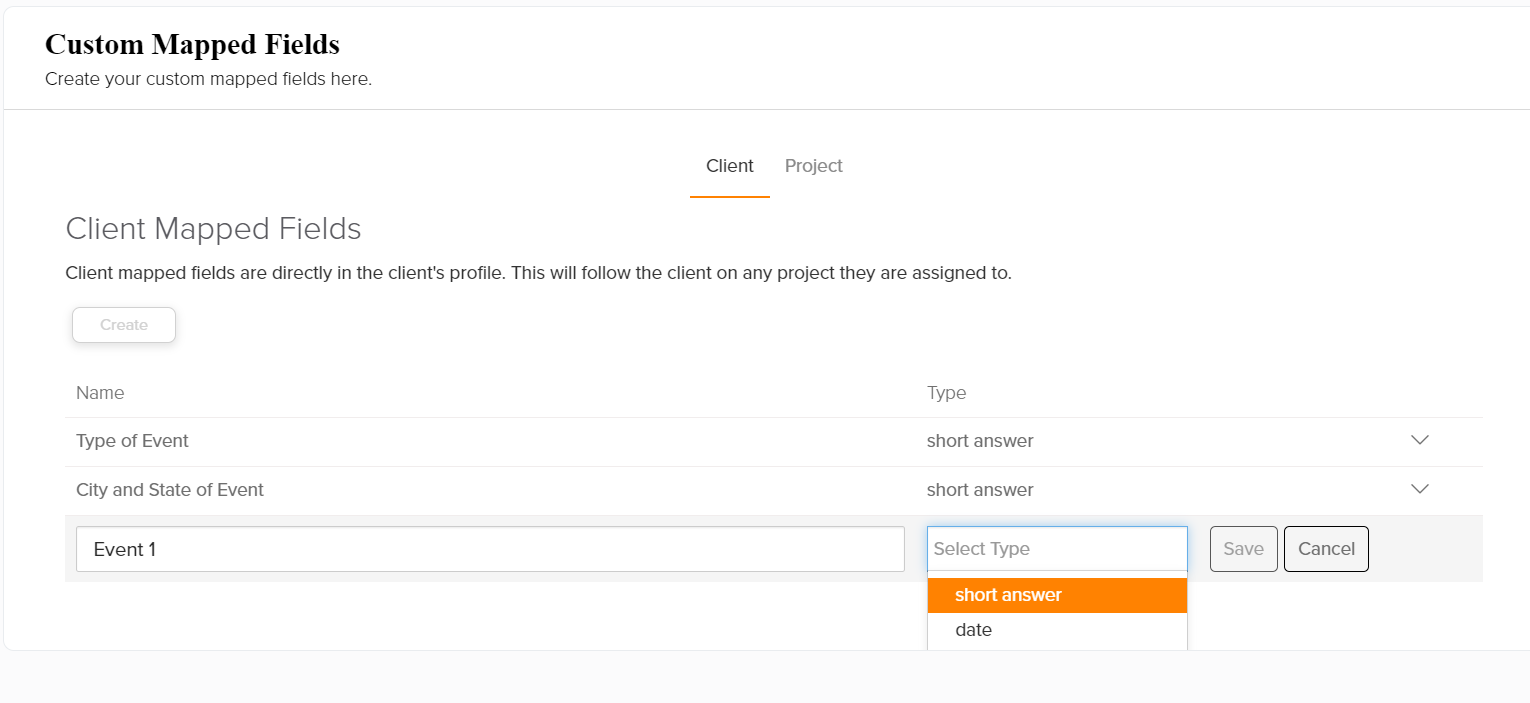
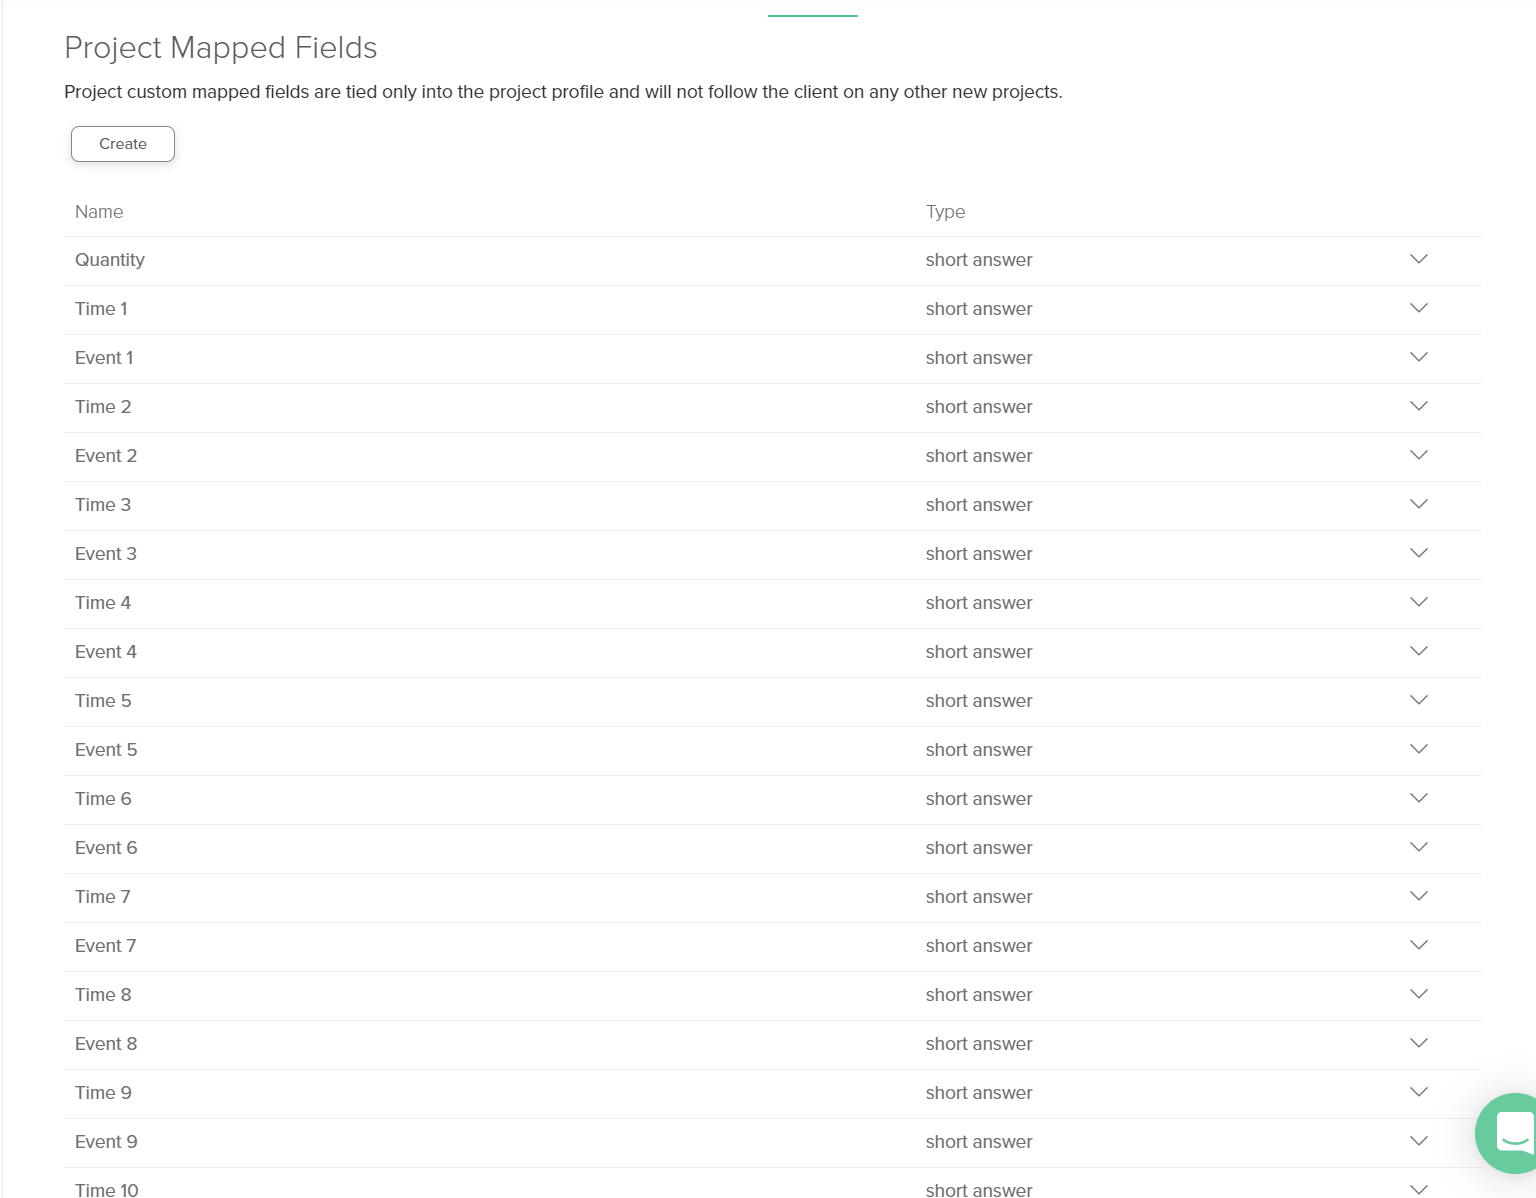
You will need to do this quite a few more times. The next field you will create is Time 1. From there on you will need to create Event 2, Time 2, Event 3, etc. In my wedding photography business, my timelines are fairly detailed, so I’ve found that creating about 30 of both event and time gives me enough space to fill in everything I need. When you are finished, your project mapped fields should look something like this:
Building The First Form
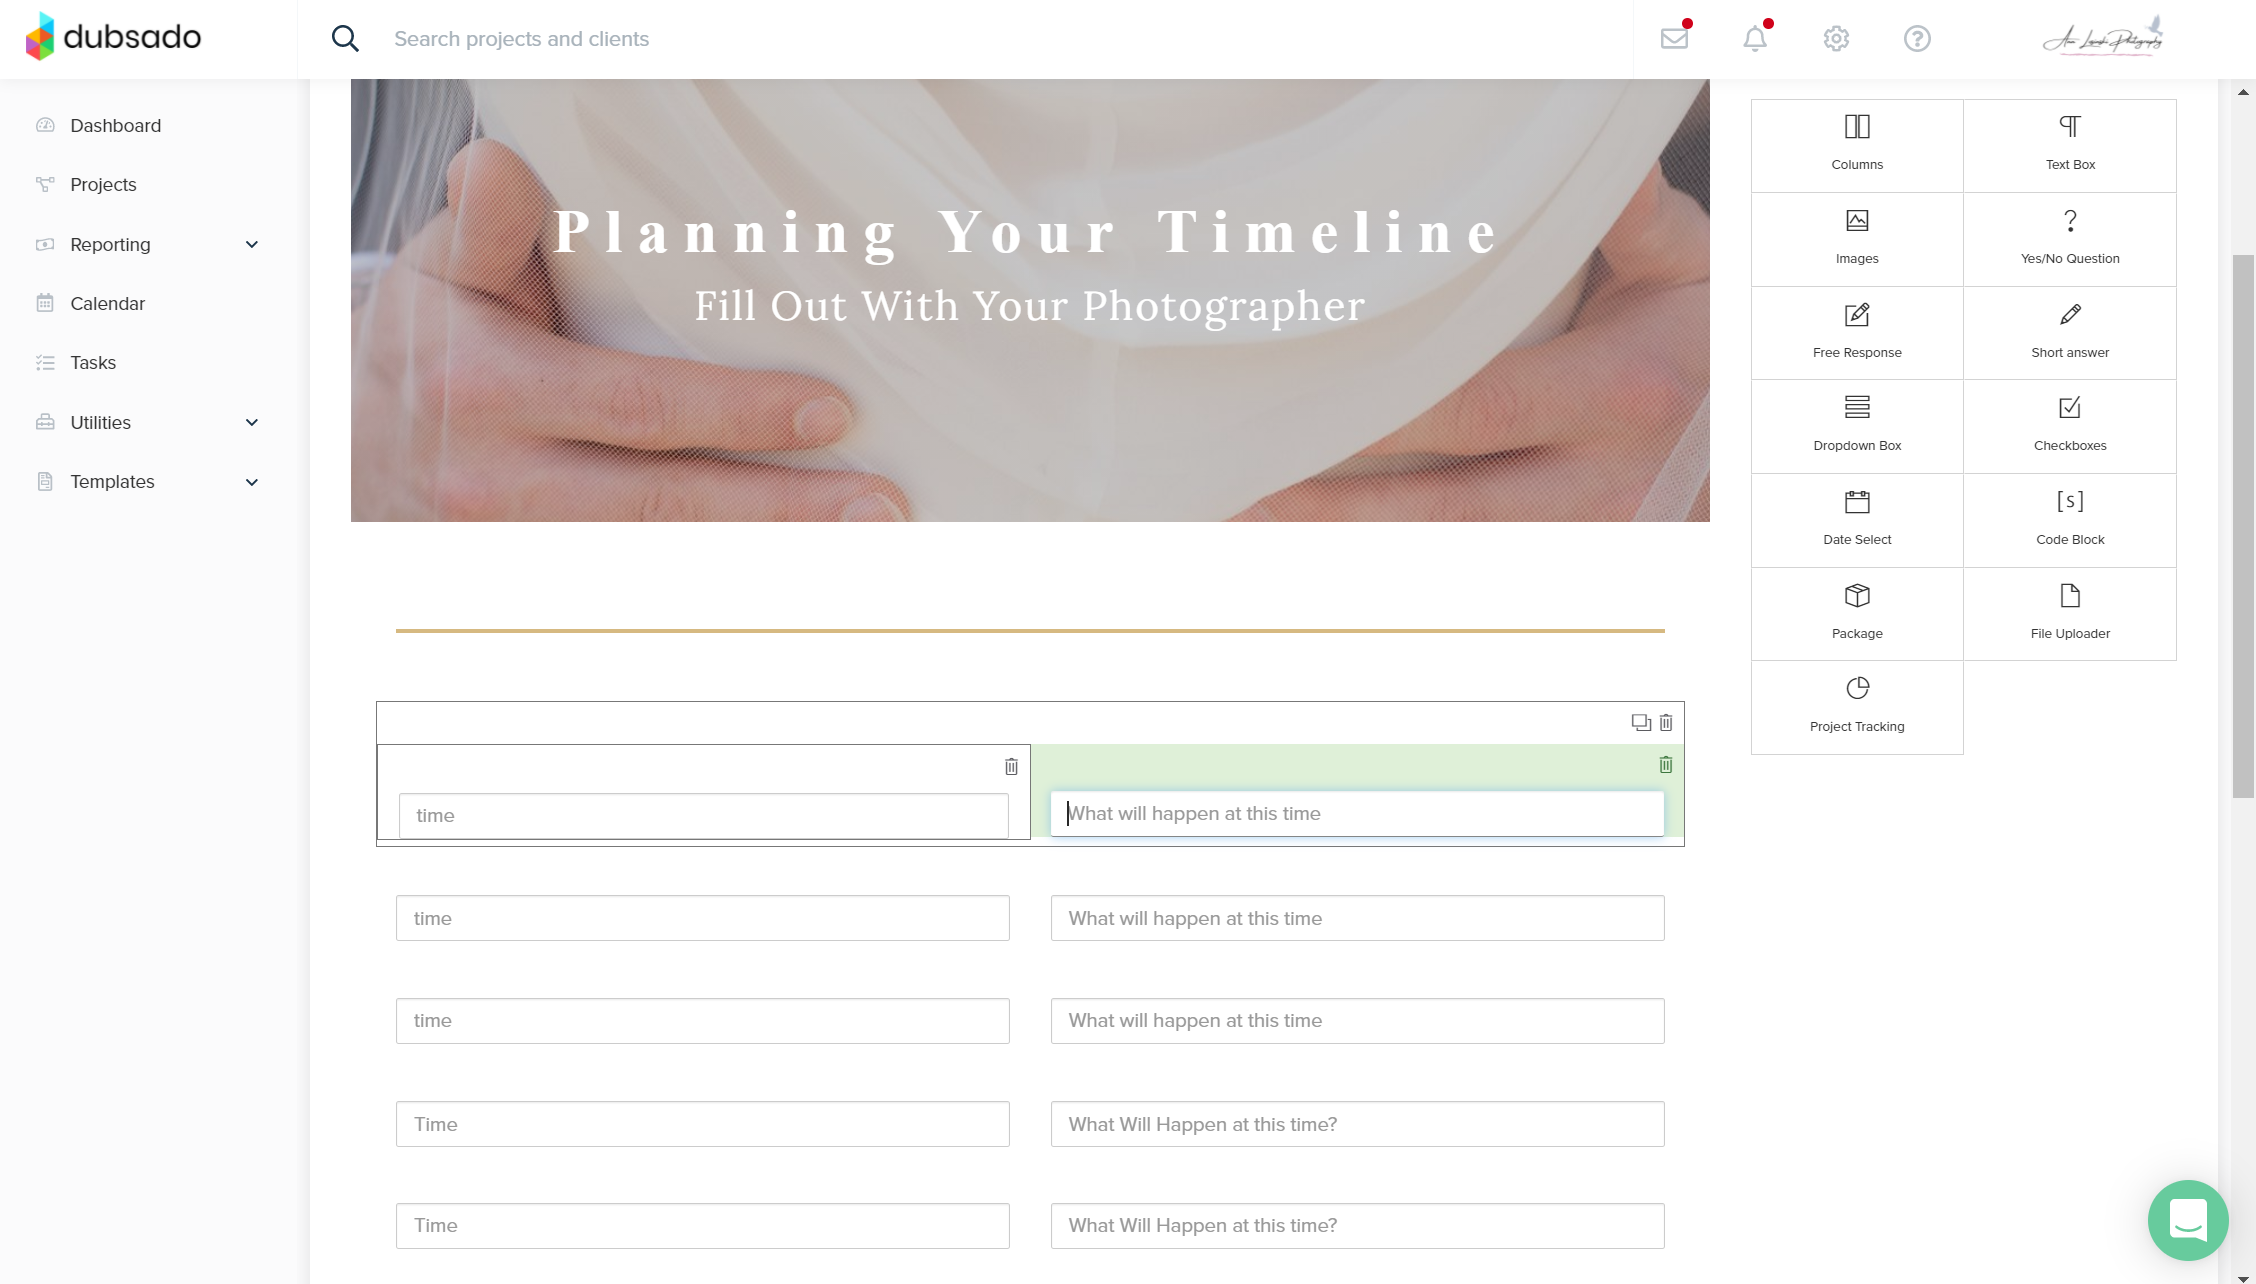
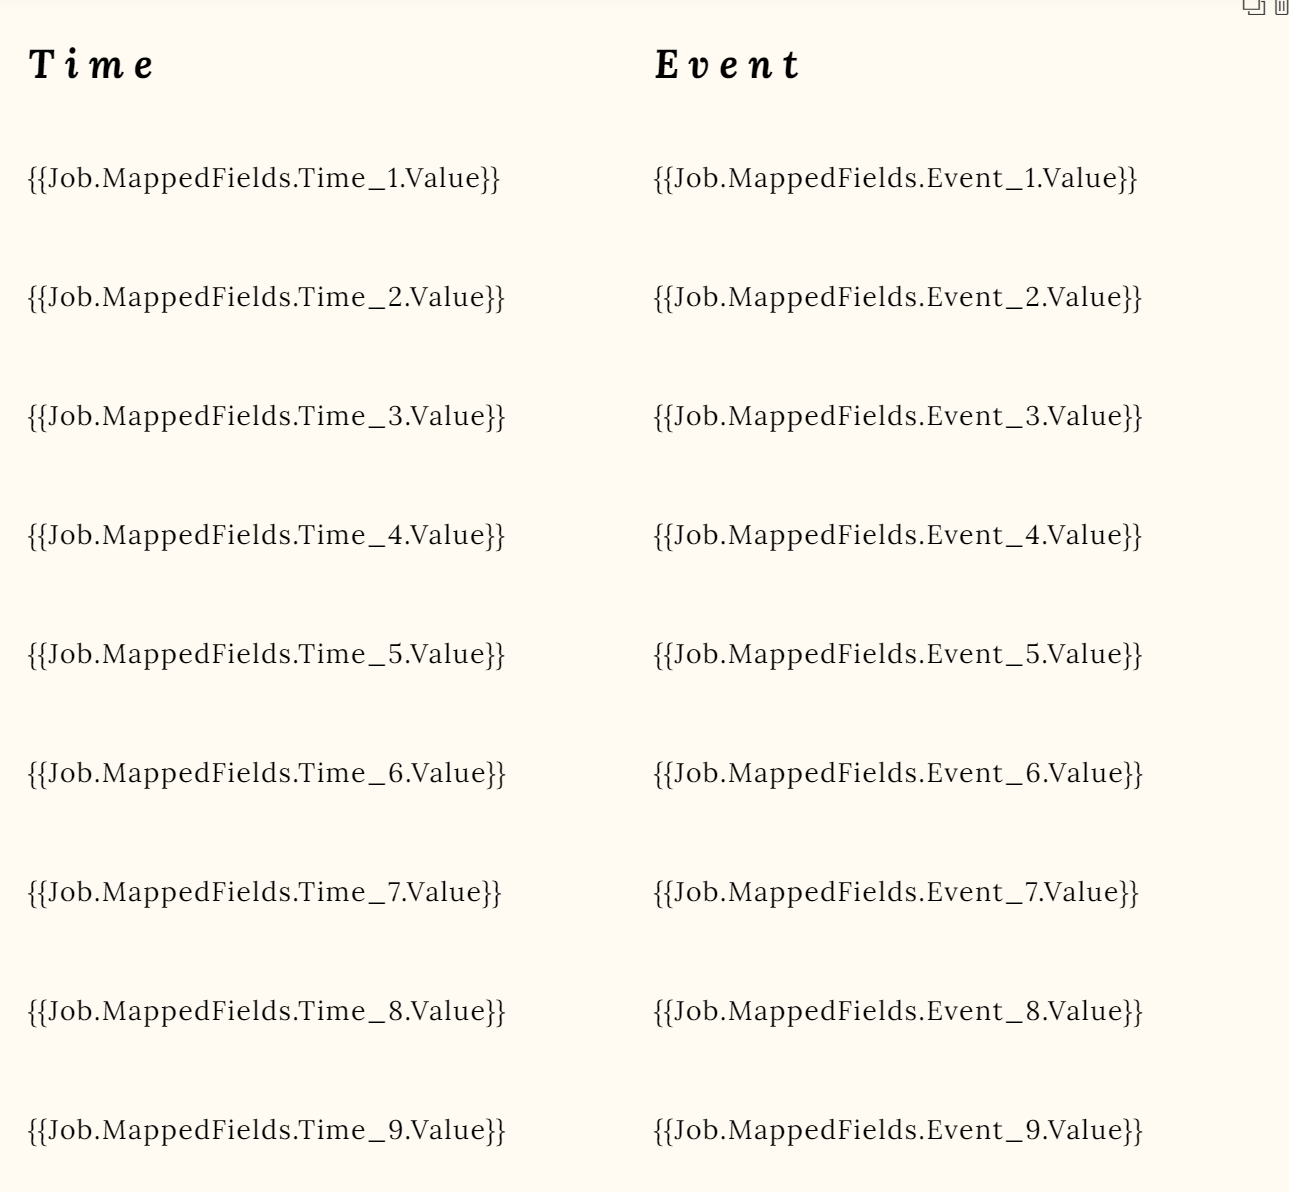
Next, we will create our form for us to fill out on the back end. For our first form, you will create a new Questionnaire Template. Your client won’t necessarily see this form, so you can keep it super simple. On this form, you just need to put in two columns and then put in text boxes into each of those columns like so:
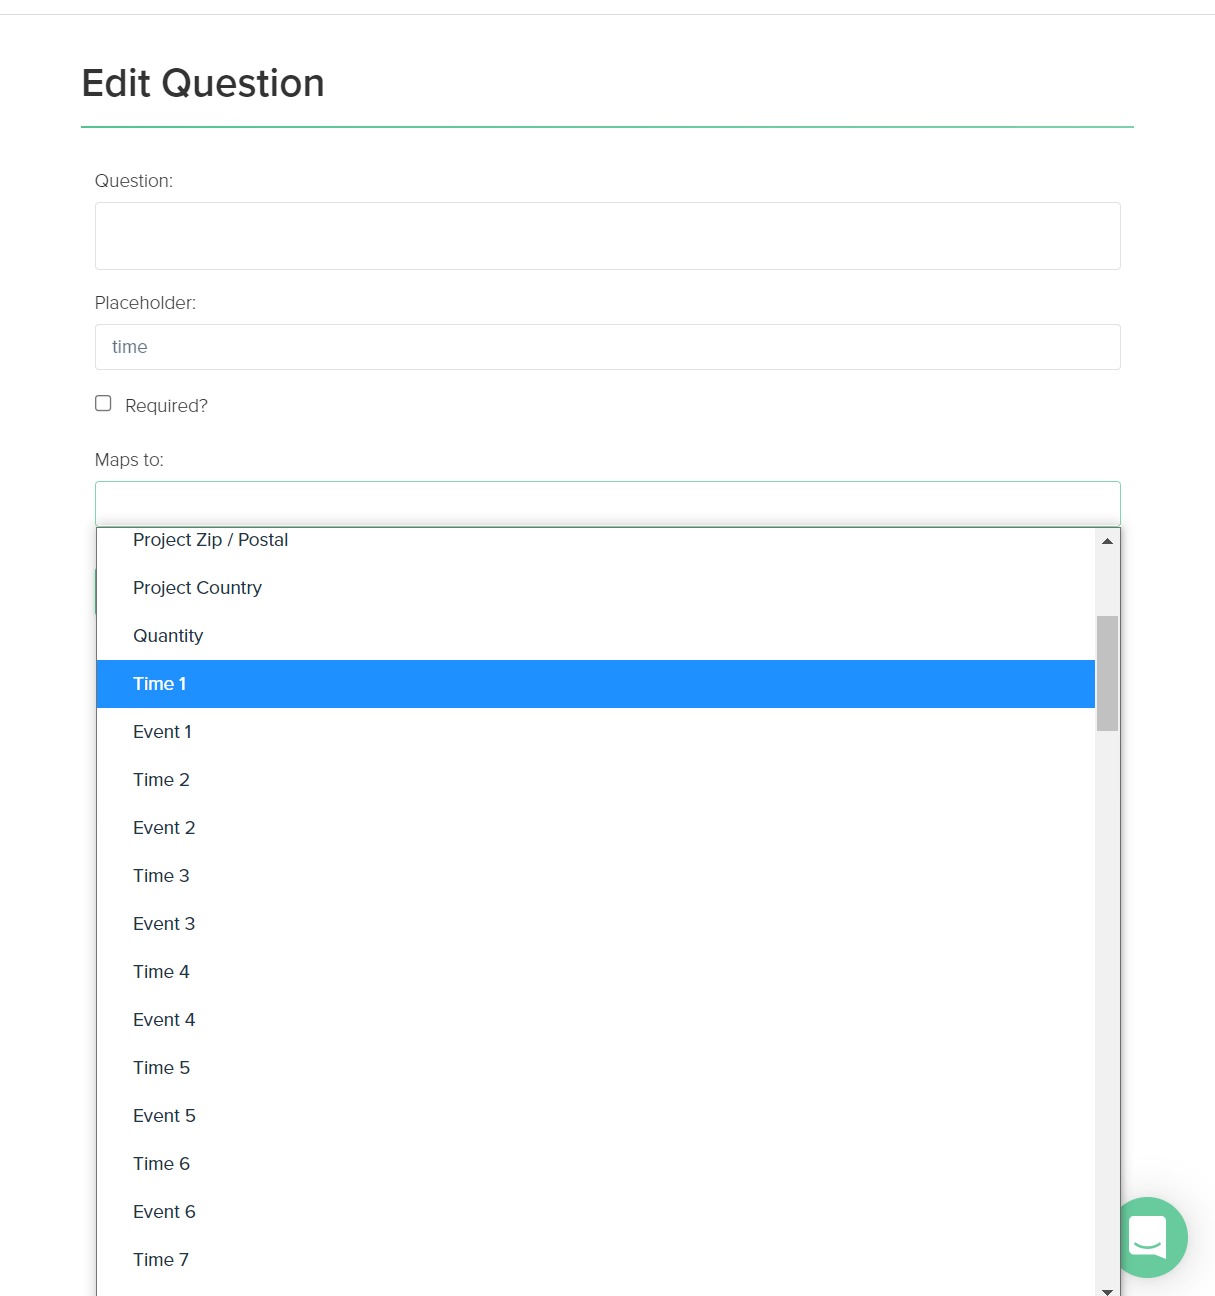
Next, we are going to map all of those text boxes with the smart fields you have created. When you go to edit the question, click on the “Maps To” drop down, and then scroll down to see your smart fields. Starting at the top, map the first column on the left to “Time 1” and the First column on the right to “Event 1”. Then continue to work down your form mapping to “Time 2” and “Event 2” etc.
Building The Automatic Timeline
Now, here comes the fun part, making the timeline that your client will see! You will need to create a second form template. For this form, you will want to create a new proposal form template.
You can use code to easily generate a background and header image as shown at the top of this post. You can also put whatever other information you would like on the form at this time.
To add your smart fields, you can do this in a couple different ways. The easiest way to do this, is to grab my Table Code and just paste it into a code block on your form. If you have your smart fields named the exact way I do, (Event 1 etc.) this should work just fine and will populate up to 30 rows for you! Alternatively, if you do not wish to use code at all, you can also simply add in a text box to your form, add a table into that and then input your smart fields.
Once you paste in the code in, your text will look something like this:
You can also use code to remove the PDF download button, hide the submit button, and hide the form names at the top.
Save the form. Now you can test it out to see if it’s working correctly!
Testing Out Your New Form
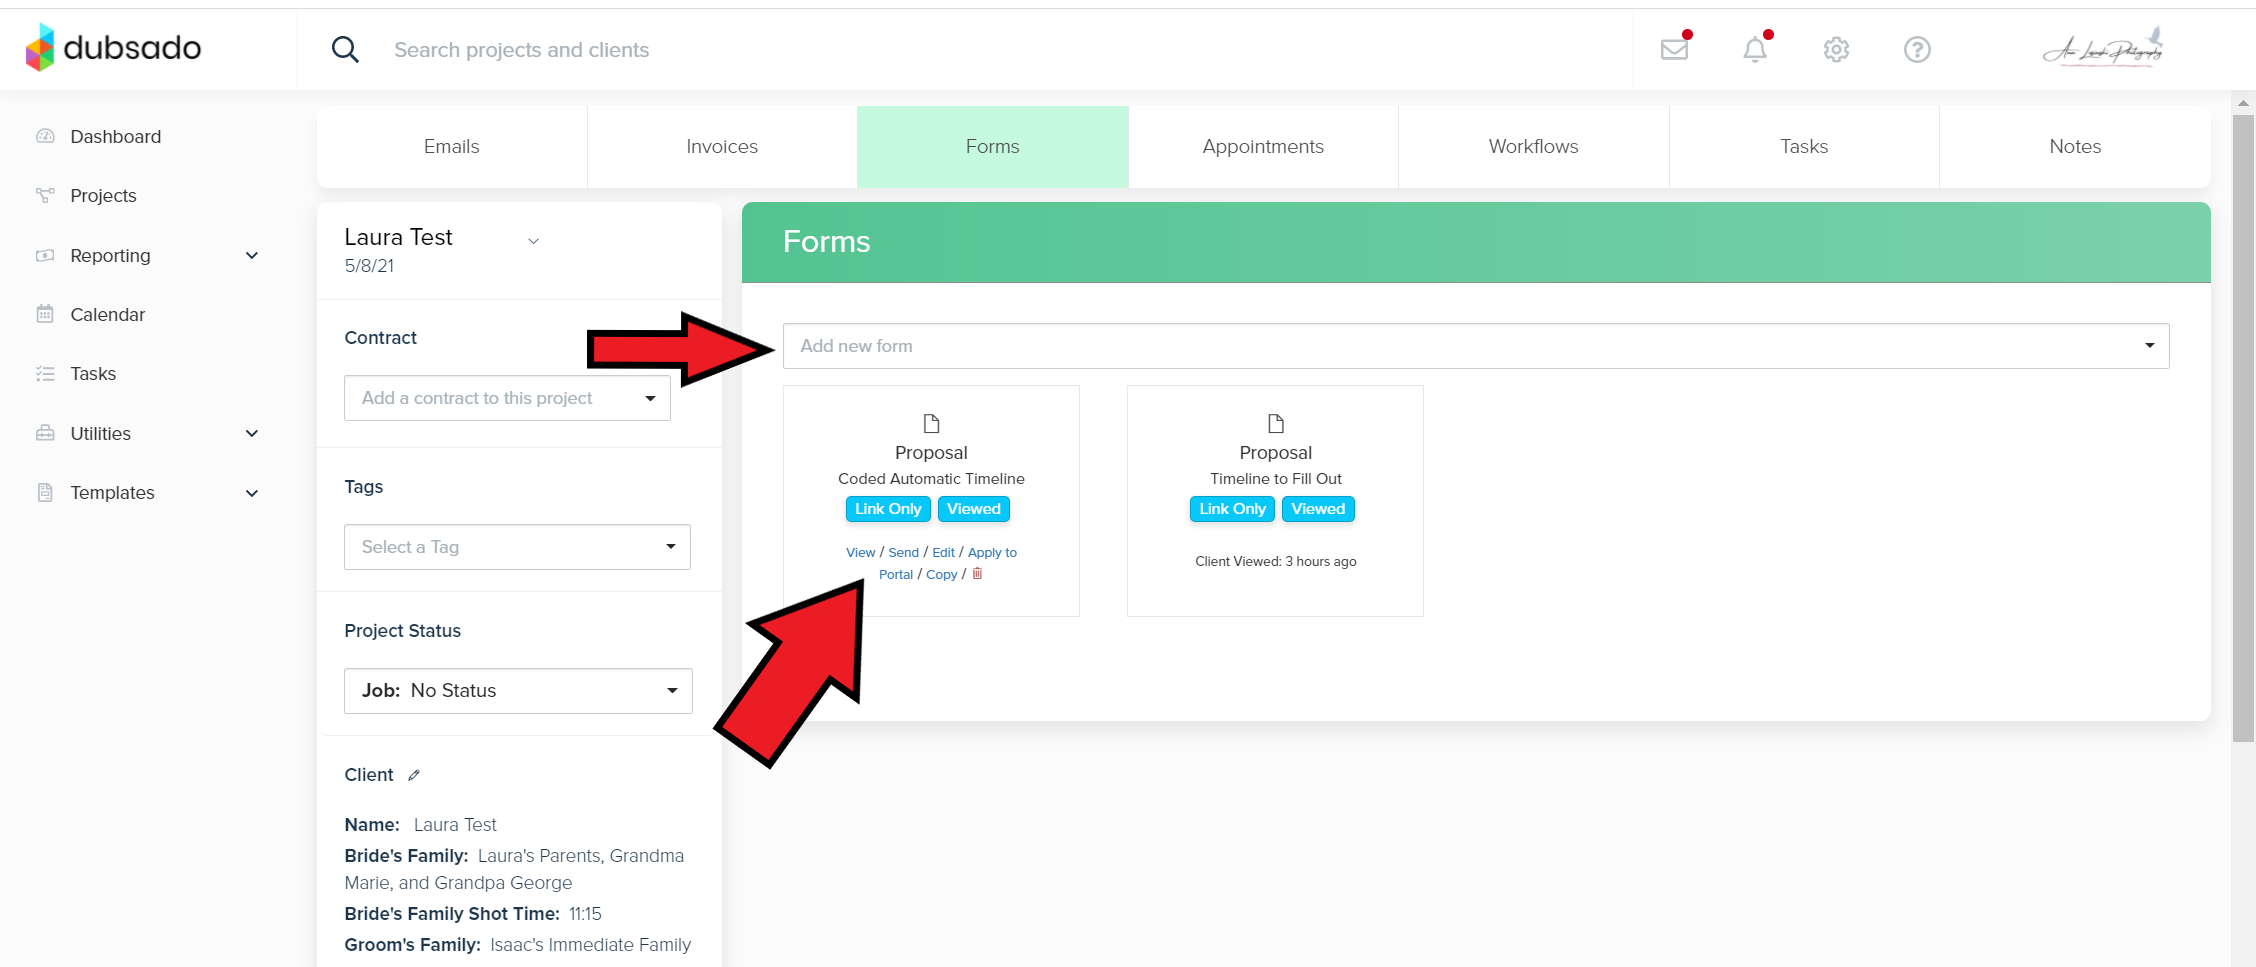
On a sample project within Dubsado, add in both forms you created.
Now, if you open up the first form in an incognito browser, you will be able to fill out the information in it. Work from the top down. If you don’t use all 30 rows, just leave them blank. Hit submit. Now all the things you typed in should be mapped to your sample project. You can now open the second form within your project and it should display your information!
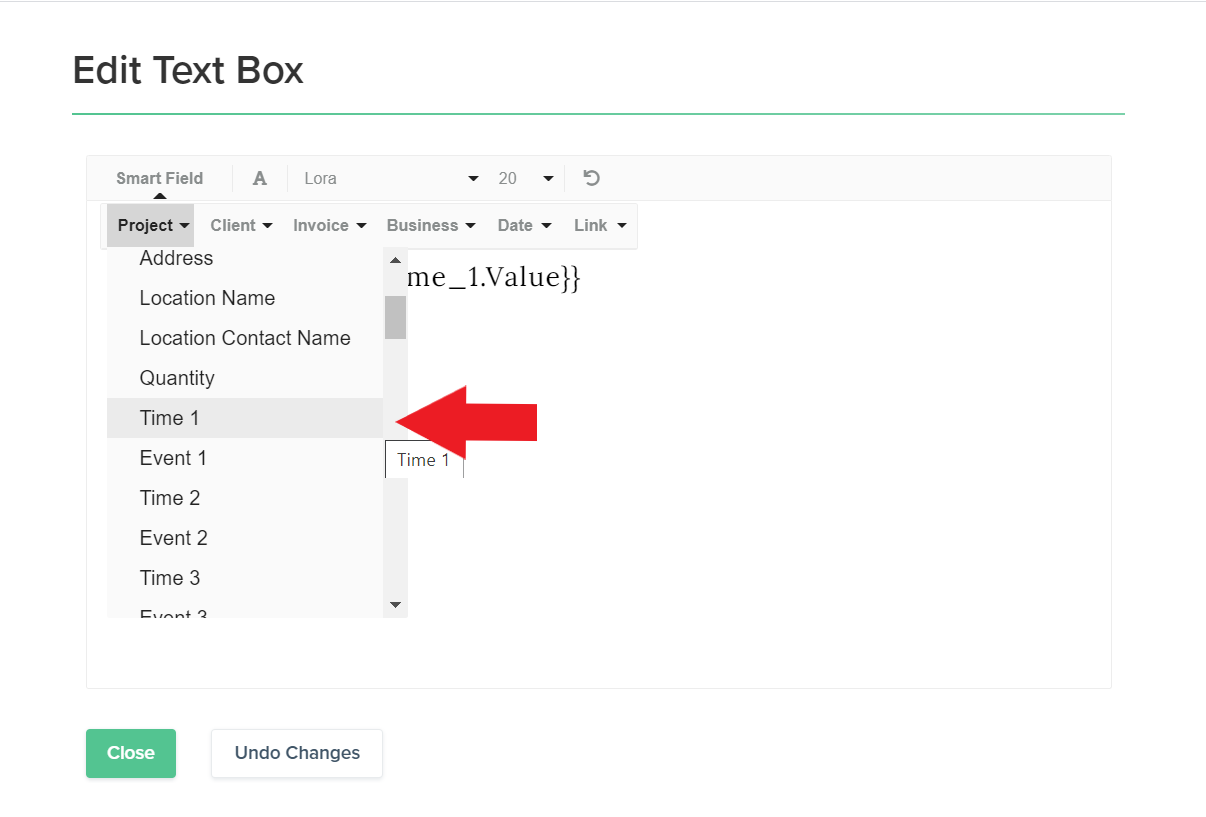
If you are not seeing it, try exiting out of Dubsado and reloading the form. If you still don’t see it after that, try copying one of the smart fields from the text box editor. Just click Smart Field -> Project and find the tag you would like. Copy the tag and paste it into your code block replacing the current ones.
Using Smart Fields Elsewhere
You can use the instructions on how to locate the smart fields in the text box to populate these smart fields wherever you would like. You can use them on contracts, on other forms, canned emails, or if you use the Dub-In Generator, you can also use them within those templates as well!
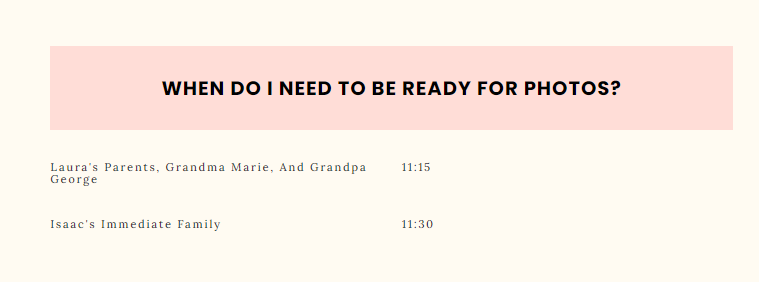
You can also use this time to create more smart fields for information that you would like to populate into the form that is different for each client. Personally, I also have a smart field for “Bride’s Family Shot Time” and “Groom’s Family Shot Time” as well as smart fields to enter in the names of the people who are included in those photos.
For the last part of my form, I simply use two columns and four text boxes with some additional mapped smart fields to add in some additional details.
I hope this was helpful in allowing you to get your own Timeline forms and custom smart fields set up so you can streamline your business even more and provide an even better experience for your clients!