Should you use Dubsado's to-do or approve function?
Should you use the approve button or a to-do in your workflow? When working with Dubsado, these are the two options you have for more manual control over your automation. In this blog post, I’m going to go through each one individually, let you know how each one works and how they are different, and what I recommend doing for your own workflows.
The Dubsado Workflow Approve Button
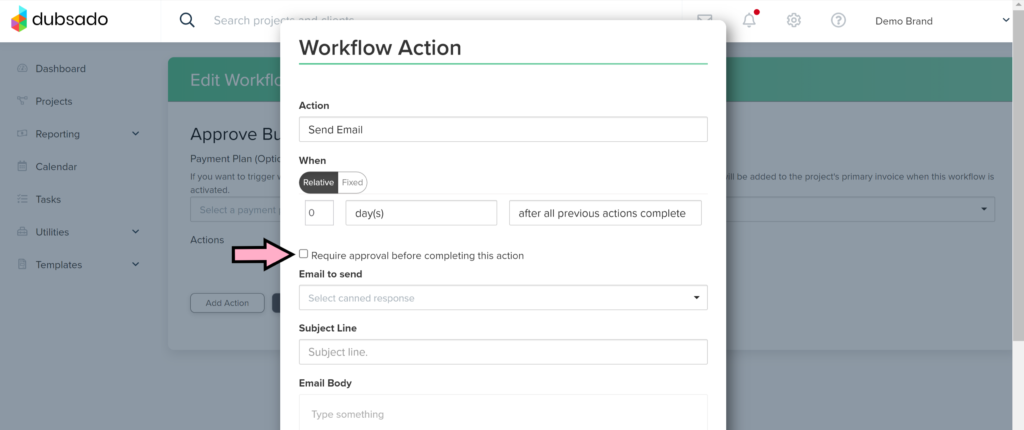
Let’s talk about the Approve button first. This action is set up on workflow steps when emails will be sending to your clients. (For example, send email, send scheduler, etc.) When you check this box on a workflow item, a little “Approve” box will appear. This button allows you as the business owner to have control over whether a certain action actually happens.

Without clicking this button, this specific action won’t trigger. You can approve actions immediately once a workflow has been applied to a project. The one downside to this is once an action has been triggered, you have 3 hours to get into the system and approve it. If you are away from your desk, or don’t see the notification, there is a chance that it might slip through the cracks and an action you need to happen might not happen like you want it to.
The approve button can work well if you have situations where you can approve things early on in your workflow. Or, if you know you will be at your computer when the action triggers (Such as directly after a discovery call) that might also be a safe place for the approve button.
Personally, I do not recommend using the approve button, as it can create confusion if you forget to approve something.
Personally, I do not recommend using the approve button, as it can create confusion if you forget to approve something.
The Dubsado To-Do Action
In contrast, we also have the ability to use To-Dos on our workflows. This handy workflow action can essentially pause any actions with the trigger “After all previous actions complete”.
I love using To-Dos instead of the approve button, especially in my lead phase because unlike the approve button, the to-do does not have a time limit. I will use them to pause the workflow to edit proposals prior to sending, or creating a pause until I know the date is open and the client is a good fit. They are also great for pausing the workflow while you are doing things like editing a client’s photo gallery or adding in additional workflows for engagment sessions.
I often will use the To-Do as reminders to edit or delete certain workflow steps as necessary. Sometimes, I have already had a conversation about scheduling a meeting with a client before my automatic email goes out and I want to make sure that they don’t get confused by an email asking them to schedule that same meeting!
This is especially handy to future proof yourself for when you hire an assistant to help you. Having everything laid out in a To-Do step will make sure everything gets done how to want it to!
In Conclusion
Both these options offer a sense of control over your workflows. For those that have specific situations where you want to make sure that an email does not go out until you have had a chance to review information or complete a task, both these options will allow you to do that.
You can definitely do a combination of the two if you want to be super certain something won’t trigger without your consent, just remember that once the approve button is triggered, you only have 3 hours to get to it before it will not allow you to approve the action any longer!

