Cloudspot Mini Sessions
Recently, Cloudspot has entered the CRM market with the addition of their CloudSpot Studio. This is exciting for photographers because this will allow those who host their galleries with CloudSpot to also facilitate their client management. One of the key features that CloudSpot introduced with their studio is their Mini Session scheduler.
In this blog post, we will go through how to set up a Mini Session in CloudSpot and the different options you have for customization.
Full Video Walkthrough
Step 1 - Determine Your Information
Before we even step into setting up Mini Sessions with CloudSpot, we need to first clearly define the information behind our mini sessions. You will need to know the following:
1.) The Date(s) of your mini session
2. ) The time slots for your mini sessions. As a good rule of thumb, you will want at least a 15-minute buffer in between clients.
3.) The price of your Mini Sessions.
Once you have determined the above, you are ready to start setting up your Mini sessions.
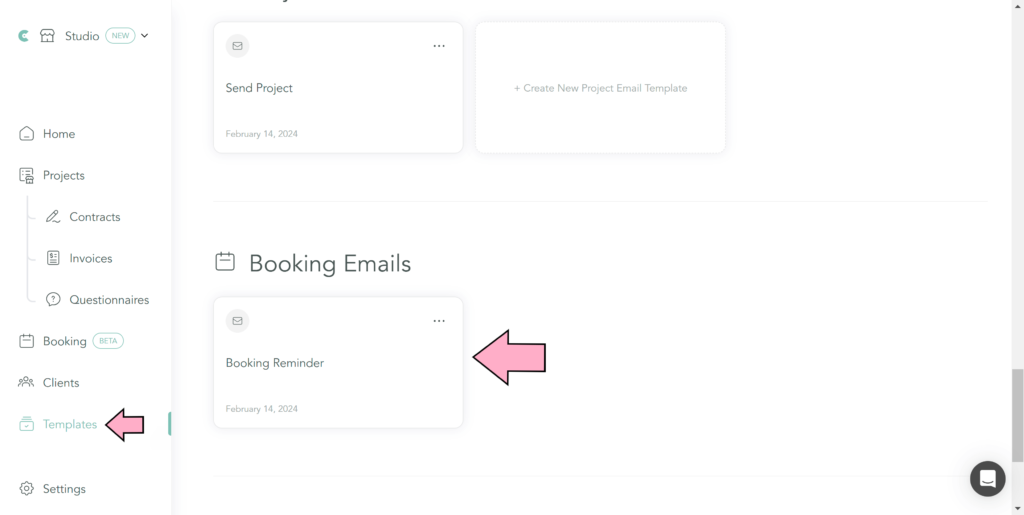
Update Your Booking Email
When you use CloudSpot Studio for your Minis, your clients will receive one reminder email, 24 hours prior to their selected time. You will be able to customize this email under Templates -> Booking Email. This email is able to be customized via smart fields, but at this time, there is no way to send different emails depending on what session is signed up. You also are not able to send out additional reminders automatically or change the time at which this reminder is sent.
Create Your First Mini Session
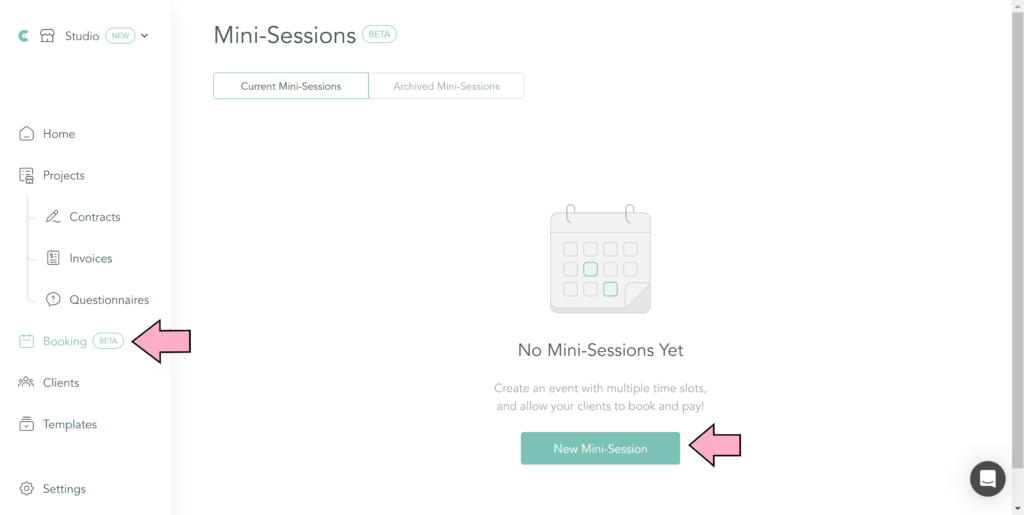
Next, navigate to the “Booking” tab on your CloudSpot Studio. This will allow you to create your first Mini Session. Click “New Mini Session” to begin.
Fill Out Basic Information
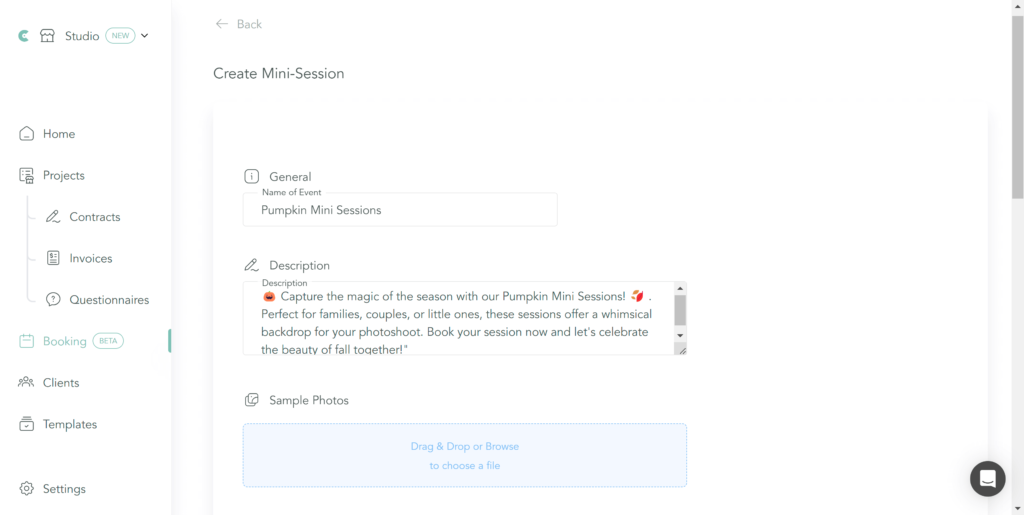
In the first three sections of this page, you will fill out some basic information about your Mini Session. Give your Mini Session a name, enter a short description, and add in some sample photos of what clients might expect with your session.
Tip 1: Each Mini Session template created in CloudSpot currently only allows you to put in availability for one day. If your Mini Sessions will be over the course of two or more days, it is good practice to put the date in the title.
Tip 2: You can upload multiple photo files. The files will be placed in a carousel at the top of your booking page and will scroll automatically.
Set Your Date and Time
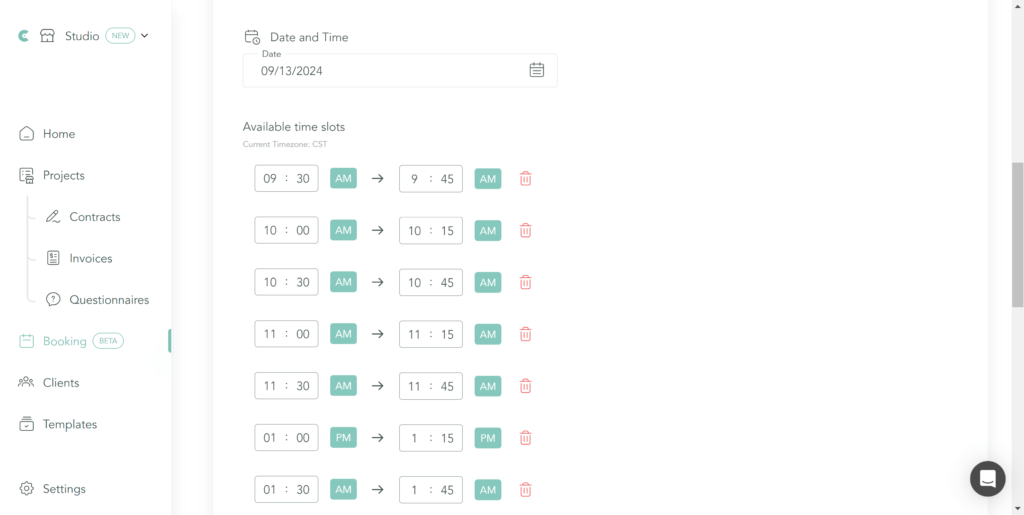
Next, as you scroll down the page there is a section to enter the date and time for your Mini Sessions. CloudSpot has set up its scheduler so that instead of entering your total available time and putting parameters around that, you will need to enter each time slot individually.
First, set your date. CloudSpot only allows you to select one date. If you have multiple dates, you can easily duplicate your Mini Session in a future step.
Next, add in each time slot. In the screenshot below, you will see an example of how to set up your time slots for 15 minutes, with a 15 minute break in between each one:
Terms and Conditions
At the very bottom, you have the option to toggle on the terms and agreements that clients agree to when booking. Toggling this on allows you to type in your own conditions. This is similar to asking them to agree to a contract prior to signing
When you are ready, click the “Create Mini Session” button to create your Session.

Congratulations!
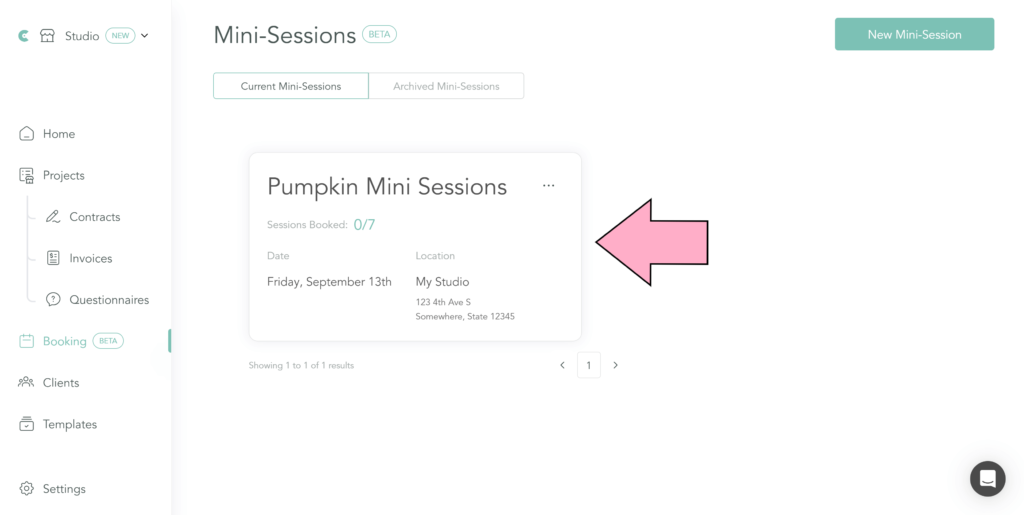
You have now created your first Mini Session! You will be able to see this new session displayed on your “Booking” dashboard.
Mini Session Info Page
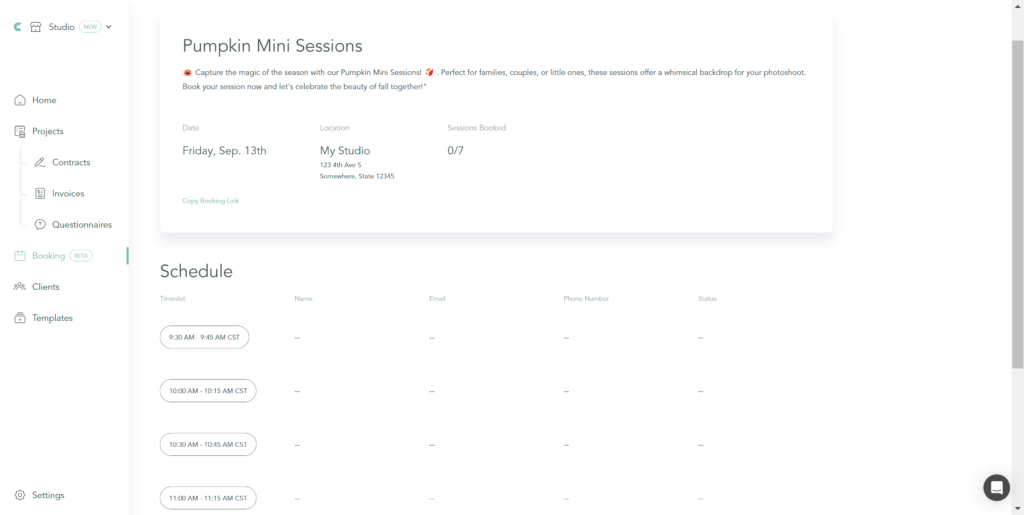
If you click on your Mini session, you will be able to see all the information, see the names and contact information of all the people who booked your session.
Sharing Your Mini Session Booking Page
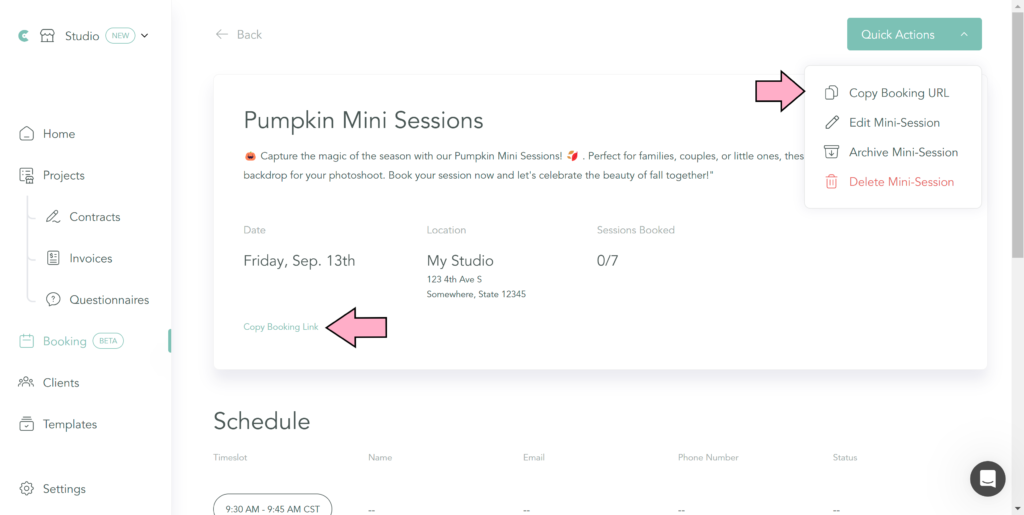
Sharing your booking page is easy – all you have to do is click the “Copy Booking Link” in one of two places, either right under the information for your sessions, or under the quick actions menu.
What To Do If Your Sessions Are Multiple Days?
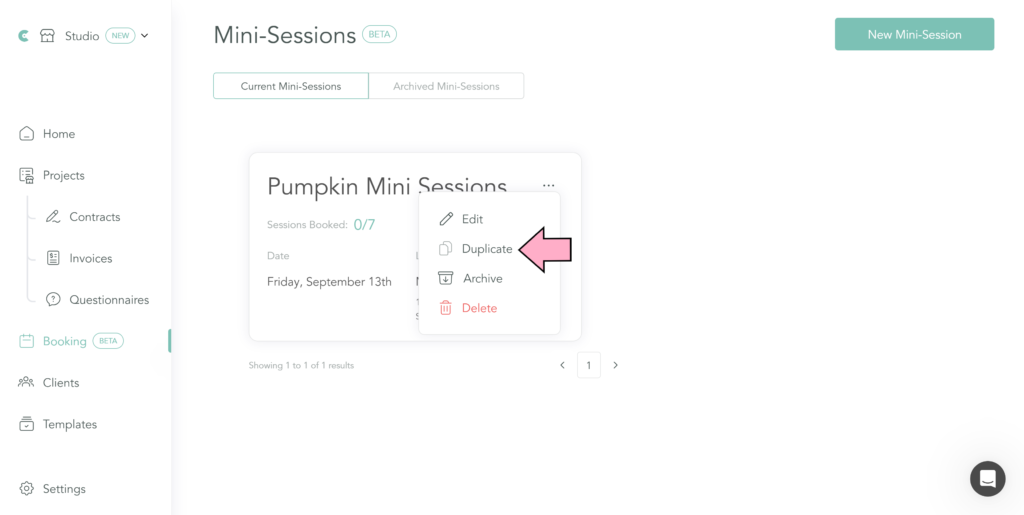
Because of the way CloudSpot is set up, you will need to create a separate scheduler for each day that your Mini Sessions will run. This is super easy to do – just click the … at the top right corner of your current Mini Session and then click “Duplicate”.
Once you duplicate the session, you will be able to edit the date, time, and any other information that is different than your first day. From there, you are able to share these links to your audience to book sessions for that day as well!
