Tracking Leads with Google Analytics 4
One of the questions I hear a lot is how to track the number of times a lead capture form has been filled out on your website. But did you know that there is an easy way to be able to set this up inside your Google Analytics 4 account?
Here’s how:
1.) Create a hidden, non-indexed thank you page on your website.
2.) Set the redirect on your lead capture form to that website.
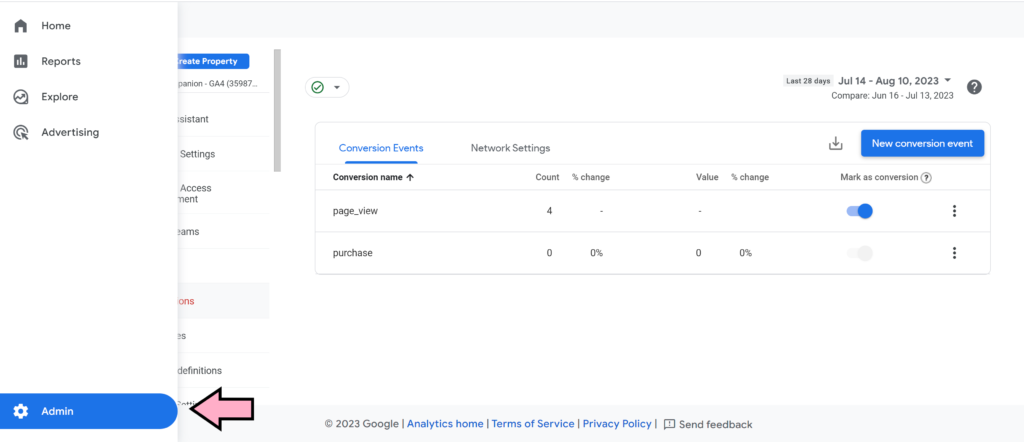
3.) Navigate to the Admin Panel of your Google analytics account.
4.) Add an event that triggers when someone visits that specific page.
5.) Change that event to a “Conversion” so you can easily see that data.
Let’s go into a little more detail on each of these steps.
Step 1: Create a Thank You Page on Your Website
The first step is to create a hidden page on your website that acts as a thank-you page. The exact steps that you need to take here will vary based on the website provider that you are using, but essentially you just need to have a simple page that is created that thanks the lead for submitting the form and lets them know you will be in touch.
You will want to make sure this page is hidden, not included on any menus, and not indexed by search engines so that nobody will accidentally stumble upon it and mess up your numbers.
Step 2: Add this Website to the redirect portion of your Lead Capture Form
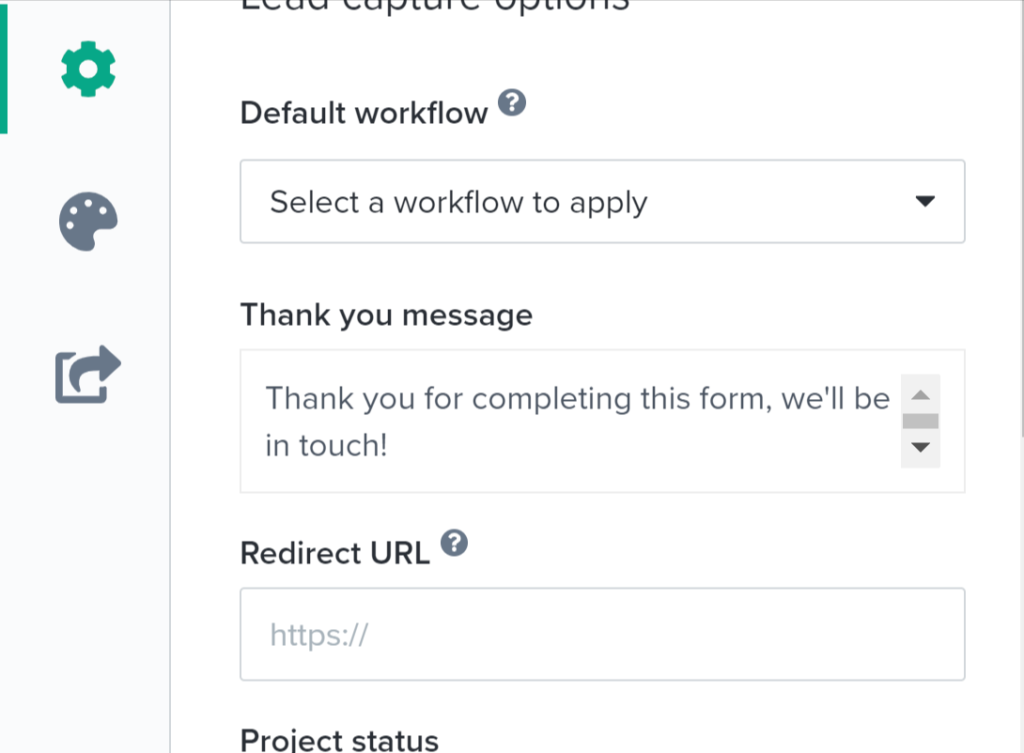
Next, you will go into your Dubsado lead capture form settings and add a redirect to that form. Paste the URL of the page you just created into the redirect section and save the form.

Step 3: Navigate to the Admin Panel of Your Google Analytics 4 account.
Next, you will go into your Dubsado lead capture form settings and add a redirect to that form. Paste the URL of the page you just created into the redirect section and save the form.

Step 4: Create an Event to track page views.
On the admin panel, click on “Events” and then click “Create Event”

On the panel that pops up, click “Create”

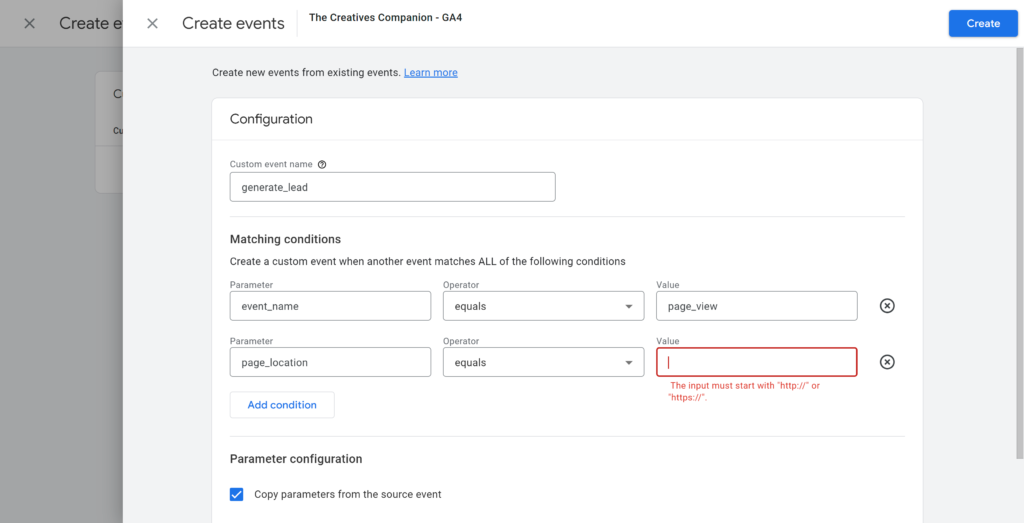
Type in an event name, and then under “Parameter” type “event_name” equals “page_view”. Then add a new condition. Set the second parameter to be “page_location” equals thank you page URL. Make sure you type in your entire thank you page url, and then click “Create” at the top.

Step 5: Change Your Event to a Conversion
Under the events menu, click on “Mark as Conversion” Next to the event you just created. Now you will be able to track each time the page is visited (and hence, each time your form is submitted!)


