In this article, we will be discussing how to migrate from Honeybook to Dubsado. By the end of this post, you should hopefully have a good idea of how to move your clients from Honeybook to Dubsado without interrupting your services.
Migrating from Honeybook to Dubsado can be done in 10 easy steps:
1.) Set up the basics of your Dubsado account
2.) Create packages and forms
3.) Create your workflows
4.) Export your clients from Honeybook
5.) Upload existing clients into Dubsado
6.) Upload existing completed contracts
7.) Upload existing forms
8.) Add existing payment plans and invoices
9.) Apply Dubsado workflows to existing clients
10.) Move forward with Dubsado as your CRM
Set Up The Basics of Your Dubsado Account
The first step I encourage everyone who is moving to Dubsado to do is not to directly jump into uploading your clients, but to take some time to set up your account first. You will want to take some time to connect your email, set up your branding settings, and connect your calendar. You will also want to connect a payment processor so that you can be paid. By setting up the basics of your account first, you will ensure a smooth transition when your clients are entered into your account.
This also allows you to explore Dubsado’s different features right away while still on a trial account, solidifying your decision to use Dubsado with your clients.
Create Your Packages and Forms
Once you have set up your basic settings in your account, you are ready to start creating your packages and forms. This preps your account for importing clients and allows you to have everything ready to add to projects as needed.
Create your packages under “Templates” -> “Packages”. You will want to recreate any packages that you currently use on Honeybook by adding items, price and descriptions. Add taxes to package templates to be applied automatically when the package is added to an invoice.
If you want some help without paying additional, Dubsado has a forms team that can recreate up to 10 forms for free. This is great to get the initial information into your account. The forms team will recreate the forms in Dubsado, so long as the elements that are on your form exist in Dubsado. After the first 10 free forms, each additional form is $15. This service is available even for trial accounts, so no need to pay for a subscription while setting up your forms. Send existing forms as PDFs or Google links to forms@dubsado.com for recreation into your account.
Once the forms are in your account, I encourage you to edit them, add any additional colors/images, and style them to your liking within Dubsado’s capabilities.
Create Your Workflows
Next, you will want to recreate (or create) any workflows that you have in Honeybook. Workflows can be complicated so you might need to spend a bit of time on this, but I promise that it is worth it. Don’t have an established workflow yet? Grab my Workflows for Photographers to get you started on your automation journey. Along with creating your workflows, you will also at this time want to create project statuses.
Creating your workflows is another step you can take to ensure that Dubsado is the right platform for you, all while still on the free trial without having to financially commit.
Export Your Clients From Honeybook
Once you are ready to start uploading your clients, you will first need to export them from Honeybook. Under the “Contacts” page, click on the three dots and then click “Download spreadsheet”. This will download a CSV file of all your clients.

Upload Existing Clients into Dubsado
Once the CSV from Honeybook has been downloaded, navigate to Dubsado. Under “Utilities” -> “Address book”, click the import button and then upload your file. This will import your contacts into Dubsado. Before the final upload, Dubsado will allow you to map items like “first name”, “last name” etc. Verify that these fields are correct. Check the box “import as leads” to automatically create new projects for each client and then hit submit to upload. You will need to pay for a Dubsado subscription at this point.
Tip: If you have a large CSV file, break it into smaller chunks to help it upload faster.

Upload Existing Completed Contracts
Next, we want to transfer over any contracts that were previously in Honeybook. The biggest question is whether you want all of your contracts you’ve ever done recorded in Dubsado, or just your active clients. You will for sure want any active client’s contracts in Dubsado, but if you have finished a project completely, it is less necessary to upload them into Dubsado. I encourage you to download all your contracts from Honeybook and back them up elsewhere anyway. You don’t need to add all of them to Dubsado, but having a back up protects you in the event anything happens to Honeybook after you leave.
Take some time to Download your active contracts from Honeybook. I like to name them with the client’s name and year when I download them so that I know which is which.
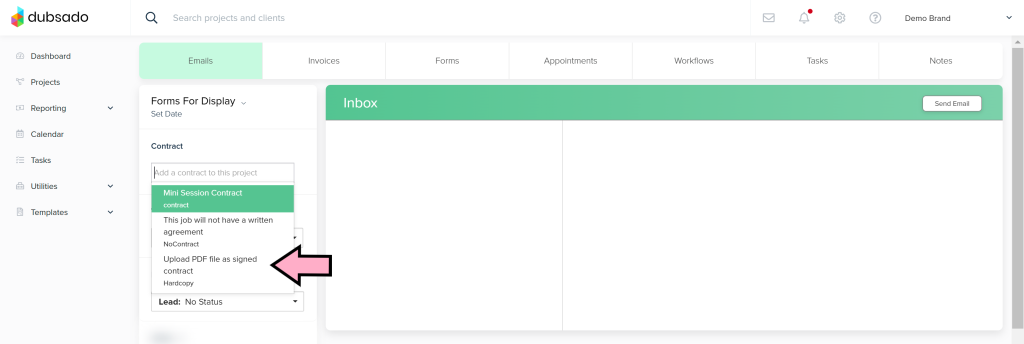
All your projects in Dubsado should have imported under the “All Leads” tab on your projects page. You will need to click into each project individually and upload their respective contracts. Inside the project, you will click on the drop-down under “Contracts” and select “Upload PDF”. Upload the respective contracts for each project.

Upload Existing Completed Forms
Similar to Contracts, forms that have already been filled out by a client will need to be manually imported into Dubsado. To accomplish this, download the forms from Honeybook as PDFs and then navigate to the “Forms” tab within the Dubsado project. Under the dropdown, scroll to “Upload New PDF as form” and then upload you PDF. You will want to do this with all existing forms on your projects.

Add Existing Payment Plans and Invoices
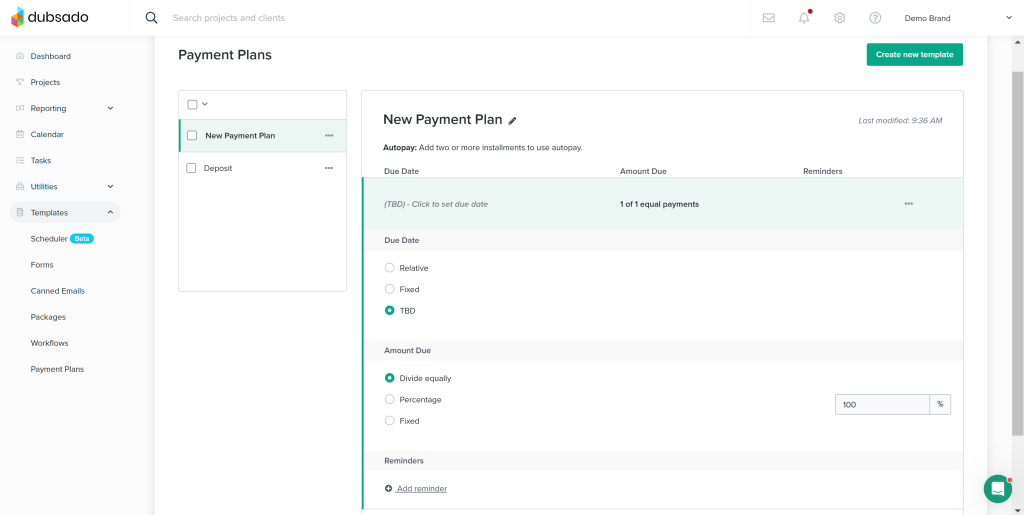
To create a payment plan to use as a template, you can go to Templates -> Payment Plans. From here, you can create installments, add reminders, and set up any payment plans that you use as standard in your business. If you have clients coming over from Honeybook that have payment plans you no longer use as standard, don’t worry! You can create those directly within the project itself.

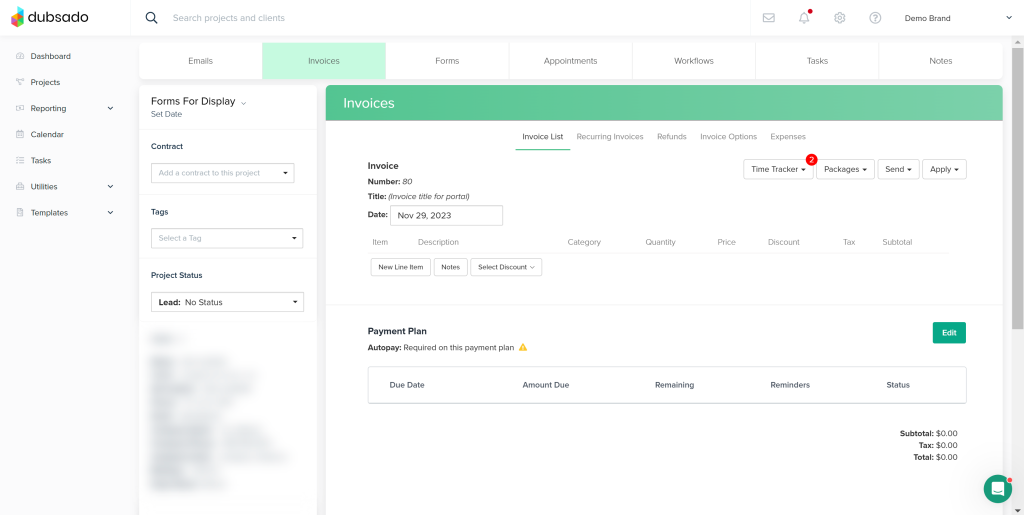
Once you have your payment plans created, you can easily apply this to your clients’ projects. Navigate to each project, then click on the “Invoices” tab. Add a new invoice. From here, you can select a package template, type in your own line items if needed, apply payments, and add payment plans for each project.

Applying Workflows to Current Clients
You can now apply workflows to clients to get them into automation for the remainder of the project. I recommend going in and adding a “To-do” action to the beginning of your workflow templates (and ensure that no items are set to “immediately after workflow starts” to avoid anything triggering that you don’t want.
From there, you can apply the workflows to your projects, delete the items that have already triggered in Honeybook, and then check off the to-do at the top of your workflow to continue the workflow. When you are all done, don’t forget to reset your actual templates in the template area so that they trigger as expected.
Moving Forward With Dubsado as Your CRM
Moving forward with Dubsado as your CRM, I recommend continuing to learn more about it by watching Dubsado’s educational videos and getting used to all the features. Dubsado is a platform that will grow with you and I promise when done correctly, it will help you with your clients.

